Task/Goal:
For our next assignment, I will need to learn how to connect Delrin pieces together using three different methods:- Piano Wire Fastening
- Heat Stake
- Peg and Slot
In addition to learning how to connect pieces of Delrin, we will be learning how to use the machines to perform those tasks:
- Drill Press
- Thermal Press
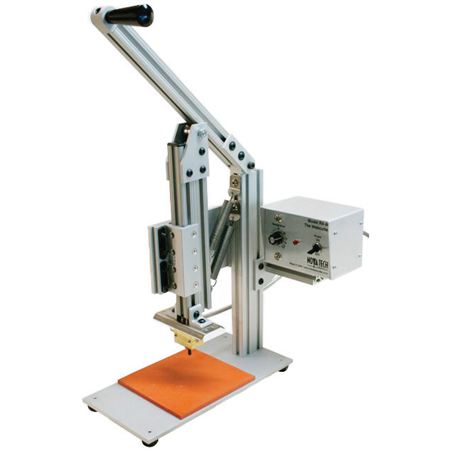
- Arbor Press

Drill Press:
Piano Wire Fastening: A drill press is used to drill a hole of a specified diameter into multiple Delrin pieces. A piano wire can then be inserted into the hole to connect the pieces.
Benefits: If done correctly, two pieces can click and lock in different positions. For example: two pieces in a 90 degree angle or same two pieces in an 180 degree angle.
Drawbacks: If not done correctly, pieces connected could be too loose or too close for pieces to turn and lock into position.
If I were to create a wheel that spins, I would use a piano wire to connect the two parts but would use a loose bushing so the wheel can spin without
restrictions. If I wanted the wheel in place to for
example a wall, I would use a tight fit.
Thermal Press:
Heat Stake: Two pieces of Delrin is put beneath the machine where heat will be applied and will melt the plastic. The piece being melted will weld into a spherical shape until both pieces melt together.
Benefits: Thermal pressing is extremely quick and easy to use, while also producing a sturdy piece because it is permanent.
Drawbacks: Because thermal pressing is permanent, once welded, there is no turning back. If a mistake is made, all parts will need to be re-cut and the process must be done again.
If I were to connect corners in an easy fashion, I would choose to use the thermal press as it is quick and easy to use.

Arbor Press:
Peg and Slot: Two Delrin pieces are connected like lego pieces, with pegs fitting in slots to create either a tight fit or loose fit.
Benefits: If measured correctly, no extra materials other than the Delrin itself is needed.
Drawbacks: Using the laser cutter to create pieces, there will be a margin of error after the laser cutter evaporates some of the Delrin material. Very easy to get a fit too tight to put together or a fit too loose for any use.
If I were to connect two slanting pieces, I would use the drill press to create a slanted hole in the material but use the arbor press to correctly line the holes and insert the piano wire.
Tight Bushings vs. Loose Bushings:
Tight bushings are beneficial when making a sturdy structure. For example making a box by connecting pieces using pegs and slots. Tight bushings ensures a sturdier box.
Loose bushings are beneficial when
When measuring the rods and bushings:
- loose bushings - 6.48 mm
- medium bushings - 6.38 mm
- tight bushings - 6.27 mm
- rod diameter - 6.06 mm
The difference in millimeters between the loose bushing and the rod diameter is 0.42 while the difference in millimeters between the tight bushing and the rod diameter is 0.21.
When measuring the pegs and slots:
- pegs - 0.2685 in
- slot - 0.2770 in
The difference in inches is 0.0085.
When measuring the peg plate with labeled widths:
- 0.135 in - 0.1400 in
- 0.125 in - 0.1335 in
- 0.115 in - 0.1150 in
The average change in distance was 0.00675 in. This means while specific dimensions were put into SolidWorks, when the laser cutter was used, the laser evaporated an average of 0.00675 in of Delrin.
Discrepancy:
When creating pegs and slots, I need to take into account the material that will be evaporated by the laser in order to create a perfect fit. Otherwise, I may end up with a loose fit when I intended for a tight fit by using exact measurements to be cut. The real part and the model may have extremely similar measurements, but the small change created by the laser cutter is big enough to change the tightness or loosness of a fit.
No comments:
Post a Comment